Getting Started with Photography: Your Complete Beginner Guide
Everything you need to begin your photography journey — from choosing your first camera to mastering manual mode and capturing images you'll be proud of.
Start Your JourneyWelcome to photography. Whether you've just unboxed your first camera or you're still deciding which one to buy, you're standing at the beginning of an incredibly rewarding creative journey. Photography is more than pressing a shutter button — it's about learning to see light, composition, and moments in ways you never noticed before.
This guide is designed specifically for beginners. We'll walk you through every essential step: selecting the right camera for your needs, understanding the fundamental exposure controls, practicing composition techniques, and avoiding the most common mistakes that frustrate new photographers. By the end, you'll have a clear roadmap to start shooting with confidence.

Every expert photographer started exactly where you are right now
Step 1: Choosing Your First Camera
The single most common question from beginners is: "Which camera should I buy?" The honest answer is that there's no single "best" camera — there's only the best camera for you, based on your budget, interests, and how much you're willing to learn. Before diving into specific models, let's narrow down the category that fits your goals.
If you want a camera that grows with your skills and accepts different lenses, a mirrorless camera is the modern default choice for most beginners. It's compact, has excellent autofocus, and every major brand now offers affordable entry-level models. If you prefer a traditional optical viewfinder and longer battery life, an entry-level DSLR camera remains a solid option — especially if you're on a tight budget and don't mind buying used gear.
For travelers who want something pocketable without sacrificing too much image quality, a premium point-and-shoot camera is worth considering. And if your main goal is capturing action, adventure, or underwater footage, skip the interchangeable-lens systems entirely and look at action cameras instead.
Don't overspend on your first camera. A mid-range body with a versatile kit lens will teach you more than a flagship camera you're afraid to take outside. Put the savings toward a quality memory card, a spare camera battery, and a basic tripod — all of which you'll actually use.
Camera Comparison for Beginners
| Camera Type | Best For | Learning Curve | Typical Price |
|---|---|---|---|
| Entry Mirrorless | All-around beginners who want room to grow | Moderate | $500–$1,000 |
| Entry DSLR | Budget-focused learners, used gear hunters | Moderate | $400–$800 |
| Premium Point & Shoot | Travelers, casual shooters wanting simplicity | Easy | $400–$1,200 |
| Action Camera | Sports, vlogging, underwater, POV footage | Easy | $200–$500 |
| Smartphone | Absolute beginners testing the waters | Very Easy | Already owned |
When comparing specific models, avoid getting lost in spec sheets. The most important factors for beginners are ergonomics (does it feel good in your hands?), autofocus reliability, and lens availability within your budget. Our first camera checklist breaks down every feature worth caring about — and the ones that are just marketing noise.
Step 2: Mastering the Exposure Triangle
Once you have a camera, the next step is understanding how it actually captures light. Every photograph you take is the result of three interlocking settings: aperture, shutter speed, and ISO. Together, these form the exposure triangle — the foundation of all photography.

The exposure triangle: three settings that control every photograph you take
Aperture: Controlling Light and Depth of Field
Aperture is the opening inside your lens that lets light reach the sensor. It's measured in f-stops — confusingly, a smaller f-number means a larger opening. An aperture of f/1.8 lets in much more light than f/16. Beyond brightness, aperture controls depth of field: how much of your image is in sharp focus. Wide apertures (f/1.4–f/2.8) blur the background beautifully — perfect for portraits. Narrow apertures (f/8–f/16) keep everything sharp, which is ideal for landscapes. For a deeper dive, explore our prime lenses guide, since fast primes are the most affordable way to shoot at wide apertures.
Shutter Speed: Freezing or Blurring Motion
Shutter speed determines how long your sensor is exposed to light. Fast speeds like 1/1000s freeze fast-moving subjects — athletes, birds in flight, splashing water. Slow speeds like 1/4s or several seconds blur motion, creating silky waterfalls or light trails. A tripod becomes essential at slow speeds; our tripods guide covers what to look for in a stable support system. A good rule of thumb: never hand-hold below 1/(focal length) seconds unless you have stabilization.
ISO: Managing Sensitivity and Noise
ISO controls how sensitive your sensor is to light. Lower values (ISO 100–400) produce clean, noise-free images in bright conditions. Higher values (ISO 1600–12800) let you shoot in dark environments, but introduce visible grain or "noise." The goal is always to use the lowest ISO that still gives you a properly exposed image with an acceptable shutter speed and aperture. Modern cameras handle high ISO far better than older models, so don't be afraid to push it when needed.
These three settings always work together. Change one, and you must adjust another to maintain the same exposure. Start in Aperture Priority mode (Av/A) — you choose the aperture, the camera handles shutter speed. It's the fastest way to learn how aperture affects your images.
Step 3: Essential Techniques to Practice First
Technical knowledge means nothing without practice. These four techniques will accelerate your progress faster than anything else. Focus on them deliberately for your first few months, and you'll see dramatic improvement.
- Practice composition deliberately. Learn the rule of thirds, leading lines, and framing. Our composition rules guide explains each technique with visual examples. Force yourself to apply one rule per photo session until it becomes instinct.
- Shoot in RAW, not JPEG. RAW files capture far more data, letting you recover shadows, fix white balance, and adjust exposure after the fact. Start with our RAW processing guide to learn a simple editing workflow.
- Understand focus modes. Single-shot autofocus (AF-S) for still subjects, continuous (AF-C) for moving subjects, and manual focus for precision work like macro. Our focus techniques guide covers each mode in detail.
- Learn from every photo you take. Review your images critically. What worked? What didn't? What would you change? This habit matters more than any gear upgrade.
Exposure Triangle
Deep dive into aperture, shutter speed, and ISO with practical examples and exercises.
Composition Rules
Master rule of thirds, leading lines, framing, and negative space to elevate every shot.
Lighting Techniques
Learn to read natural light, use golden hour, and shape shadows for dramatic results.
White Balance
Understand color temperature and get accurate colors in every lighting condition.
Focus Techniques
Master autofocus modes, back-button focus, and manual focus for sharp images every time.
RAW Processing
A beginner-friendly workflow to edit RAW files without overwhelming complexity.
Step 4: Building Your Essential Kit
You don't need a bag full of gear to take great photos. In fact, beginners often improve faster with fewer tools because they're forced to master the fundamentals. Here's the minimal kit we recommend for your first six months — everything else is optional.

The essential beginner kit: memory card, spare battery, tripod, bag, and cleaning supplies
- A fast SD card: Look for UHS-II or V30-rated memory cards with at least 64GB. Slow cards bottleneck burst shooting and 4K video recording.
- Spare battery: Camera batteries die at the worst moments. Always carry at least one spare battery — two if you're traveling.
- A basic tripod: Essential for landscapes, long exposures, and self-portraits. Our tripods guide covers affordable options that won't wobble.
- A protective bag: Even a simple camera insert inside a regular backpack protects your gear from dust and impact. Dedicated camera slings are great for quick access.
- Cleaning supplies: A lens cleaning kit with a microfiber cloth, blower, and lens pen keeps your images sharp and your gear healthy.
- A UV filter: Inexpensive insurance for your lens front element. Our UV filters guide explains what to buy and what to avoid.
Skip ultra-wide lenses, macro lenses, external flashes, and expensive filters for now. Master your kit lens first. Once you can consistently produce images you love with basic gear, you'll know exactly which upgrades you actually need.
Common Beginner Mistakes to Avoid
Every photographer makes mistakes — that's how we learn. But some mistakes slow your progress unnecessarily. Here are the most common pitfalls and how to sidestep them.
- Blaming the gear. Your camera is almost never the reason a photo didn't work. Poor composition, bad lighting, or missed focus are the real culprits. See our camera buying mistakes guide for gear-related traps.
- Shooting only in Auto mode. Auto mode prevents you from learning. Switch to Aperture Priority immediately and accept that some photos will be worse at first — that's the learning process.
- Ignoring light quality. Great light matters more than any camera setting. Shoot during golden hour, avoid harsh midday sun, and learn to see how light shapes your subject.
- Over-editing. New photographers often over-process images with excessive saturation and contrast. Start subtle. Our color grading guide explains a restrained, natural approach.
- Not backing up photos. Losing your first year of photos is heartbreaking. Set up a simple backup workflow from day one — cloud plus external drive.
Ready to Take Your First Great Photo?
Explore our complete library of beginner-friendly guides. From camera selection to editing workflows, we have everything you need to grow as a photographer.
Browse Camera Reviews & Buying GuidesFrequently Asked Questions
For most beginners, an entry-level mirrorless camera with a kit lens is the ideal starting point — compact, capable, and offering room to grow. Budget $500–$1,000 for a complete kit. If your budget is tighter, a used entry-level DSLR offers excellent value. Our first camera checklist walks you through every decision point.
You can understand the fundamentals — exposure, composition, focus — within 2–3 months of consistent practice. Reaching a level where you consistently produce professional-quality images typically takes 1–2 years of dedicated shooting, studying, and editing. The key is deliberate practice, not just taking more photos.
Absolutely not. Great photography comes from understanding light, composition, and timing — not from expensive cameras. Many award-winning images were shot on entry-level gear. Master your current camera before upgrading. Our budget cameras guide proves excellent results are possible at any price point.
Shoot RAW from the start. RAW files capture more data, allowing you to fix exposure, white balance, and shadows during editing. The downside is larger file sizes and the need to process every image. Our RAW processing guide makes the workflow simple and beginner-friendly.
Shoot deliberately with a specific goal each session. Instead of taking 500 random photos, take 20 photos with one technique in mind — like leading lines or backlighting. Review them critically. Repeat. This focused approach improves skills far faster than aimless shooting. Pair it with our composition rules and exposure triangle guides for structured learning.
Recommended Beginner Photography Gear
⚠️ AFFILIATE DISCLOSURE: This website contains affiliate links. As an affiliate Associate, we earn from qualifying purchases. If you make a purchase through these links, we may receive a small commission at no additional cost to you. Read our full affiliate policy.

Tapo 1080P Indoor Security Camera, Baby Monitor, Dog Camera, Wired, C100
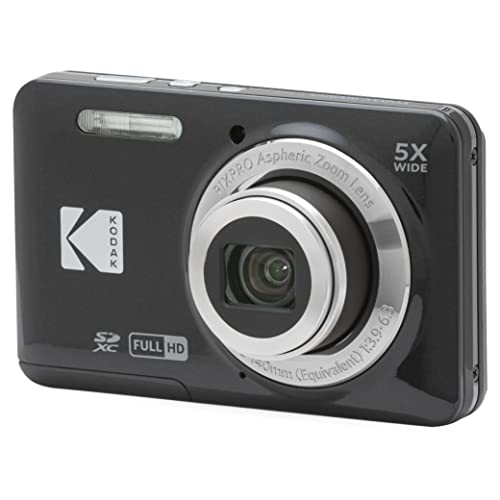
KODAK PIXPRO FZ55 16MP Compact Digital Camera, 5X Optical Zoom, Black
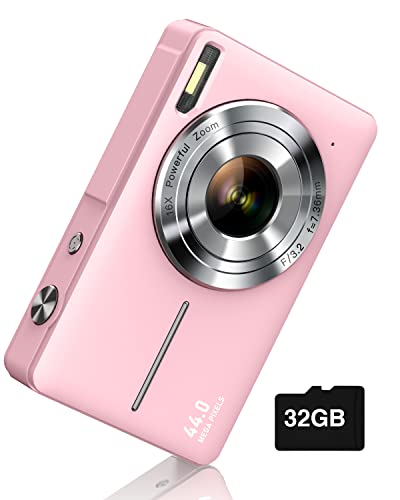
Camkory Digital Camera FHD 1080P with 32G Card 16X Zoom Easy for Kids Pink

Kasa 1080p Indoor Pan/Tilt Wired Security Camera, Baby & Pet Monitor, EC70

KODAK PIXPRO FZ45 16MP Compact Digital Camera, 4X Optical Zoom, AA, Black

Canon EOS Rebel T7 DSLR Camera EF-S 18-55mm f/3.5-5.6 is II Lens Kit

Cinnado 2K Security Camera Indoor for Pet/Dog/Baby with Phone App, D1 1Pack