
Macro Photography Guide: Master the Art of Close-Up Shooting
Everything you need to capture breathtaking extreme close-ups — from choosing the right macro lens and lighting to mastering focus stacking and composition. Your complete resource for tiny-world photography.
EXPLORE MACRO GEARWhat Is Macro Photography?
Macro photography is the art of capturing subjects at extremely close range, revealing details invisible to the naked eye. True macro photography typically means reproducing subjects at a 1:1 magnification ratio (life-size on the camera sensor) or greater. This genre opens up a hidden universe — from the intricate facets of an insect's eye to the delicate veins of a flower petal or the geometric patterns of frost crystals.
Unlike other photography genres that rely on distance and scale, macro photography demands precision, patience, and a deep understanding of how light behaves at close distances. Whether you're a nature enthusiast, product photographer, or fine art creator, mastering macro techniques will dramatically expand your creative range. If you're new to photography altogether, our Camera Starter Hub provides the foundational knowledge you need before diving into specialty genres like this one.
Macro photography overlaps with several other disciplines. Many of the focus techniques used in portrait and wildlife photography apply here, though with far less margin for error. Similarly, the lighting techniques you'll learn for macro work — diffusion, reflection control, and shadow management — will improve your photography across all genres.
Recommended Macro Photography Gear
⚠️ AFFILIATE DISCLOSURE: This website contains affiliate links. As an affiliate Associate, we earn from qualifying purchases. If you make a purchase through these links, we may receive a small commission at no additional cost to you. Read our full affiliate policy.

The Complete Guide to Macro and Close-Up Photography
Check price on Amazon
Macro Photography: Mastering the Tools and Techniques of Close-Up Photography
Check price on Amazon
Macro Photography Basics: The Complete Guide to Close-Up Photography - Master Focus Stacking, Lighting, and Magnification for Stunning Insect and ... The Ultimate Pocket Guide for Beginners)
Check price on Amazon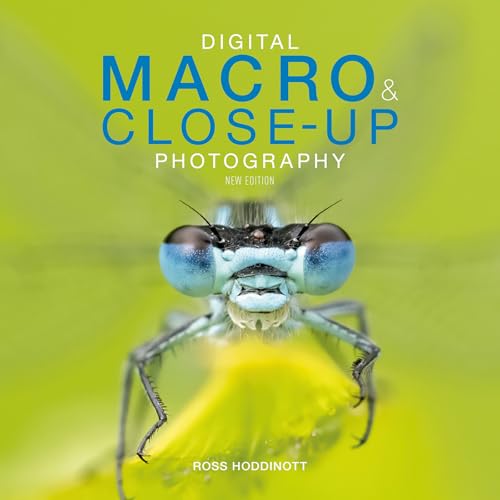
Digital Macro & Close-up Photography: New Edition
Check price on Amazon
DSLR Cheat Sheet Photography Accessories Camera Accessories for Canon Nikon | Camera Accessories Photography Essentials Gear for Canon Nikon Sony Photographer Gifts Men Women Quick Reference Cards Guides
Check price on Amazon
Complete Guide to Close-Up & Macro Photography
Check price on Amazon
Mastering Macro Photography: Pro Techniques for Close-Up Images
Check price on Amazon
Macro Photography on a Micro Budget: A Field Guide to Capturing the Tiny Universe with Affordable Gear
Check price on AmazonEssential Macro Gear & Lenses
You don't need exotic equipment to start macro photography, but the right tools make a significant difference. Here's what you need to know before buying.
Macro Lenses: The Gold Standard
A dedicated macro lens is the most important investment for serious close-up work. These lenses are engineered for flat field focus, high resolving power, and 1:1 magnification. Popular focal lengths range from 60mm to 180mm. Shorter focal lengths (60mm–90mm) are compact and affordable — perfect for product and flat-lay photography. Longer focal lengths (100mm–180mm) provide greater working distance, which is essential for skittish insects and reptiles.
| Focal Length | Best For | Working Distance | Typical Price |
|---|---|---|---|
| 60mm–65mm | Product, flat-lay, flowers | Short (5–10 cm) | $300–$600 |
| 90mm–105mm | Insects, flowers, all-round | Medium (10–15 cm) | $500–$1,000 |
| 150mm–180mm | Skittish insects, venomous subjects | Long (20–30 cm) | $1,200–$2,000 |
Alternatives to Dedicated Macro Lenses
If you're not ready to invest in a dedicated macro lens, several affordable alternatives exist. Extension tubes are hollow spacers that fit between your camera body and any lens, reducing minimum focus distance and increasing magnification. They're inexpensive ($30–$100) and work with lenses you already own. Close-up filters (diopters) screw onto the front of your lens like a filter and provide instant magnification. Reverse-mounting rings let you mount a standard lens backwards for extreme magnification, though you lose autofocus and aperture control.
When comparing options, consider how they fit into your broader kit. If you already own a prime or zoom lens, extension tubes are a low-risk way to experiment. For those building a complete photography equipment collection, a dedicated macro lens offers the best long-term value and optical quality.
Camera Bodies for Macro Work
Almost any interchangeable-lens camera can shoot macro, but some features make certain bodies more suitable. Cameras with focus peaking, focus bracketing, and high-resolution sensors give you a significant advantage. Sensor size also matters: while full-frame vs APS-C is a common debate, for macro work, smaller sensors (APS-C and Micro Four Thirds) actually provide greater depth of field at the same magnification, which can be beneficial when you need more of your tiny subject in focus.
If you're shopping for a camera that excels at close-up work, our highest-rated cameras and Editor's Choice cameras guides include models particularly well-suited to macro photography. Many macro shooters also rely on compact mirrorless cameras for their lightweight bodies and excellent manual focus aids.
Essential Accessories
- Sturdy tripod: A camera tripod with a geared or macro head is essential for precise framing and focus stacking.
- Focus rail: A macro focusing rail lets you move the camera in tiny increments without touching the tripod head — critical for focus stacking.
- Diffusers and reflectors: Harsh light is the enemy of macro. A diffuser softens flash output, while small reflectors fill in shadows.
- Remote shutter release: Eliminates camera shake when triggering the shutter.
- LED flash or ring light: An LED flash or ring light provides consistent, adjustable illumination for close-up work.
Core Macro Techniques
Technical skill separates mediocre macro shots from breathtaking ones. Here are the fundamental techniques every macro photographer should master.
1. Master Manual Focus
Autofocus is unreliable at extreme magnifications because depth of field is razor-thin. Most experienced macro shooters use manual focus exclusively. The technique is counterintuitive: instead of focusing by turning the focus ring, you set your desired magnification and then move the camera (or your body) slowly toward or away from the subject until it snaps into focus. This "rocking" motion gives you fine control that autofocus simply cannot match.
2. Control Your Depth of Field
At 1:1 magnification, depth of field can be less than a millimeter. This means that even at f/16 or f/22, only a sliver of your subject will be sharp. Understanding the exposure triangle is crucial — you'll often need to balance small apertures (for more depth) against diffraction softening and the need for more light. This is where focus stacking becomes invaluable (covered in detail below).
3. Stabilize Everything
Camera shake is magnified just as much as your subject. Use a sturdy tripod, enable mirror lock-up (on DSLRs), use a remote release or self-timer, and consider turning off image stabilization when working from a tripod. If you're shooting handheld, brace yourself against a solid surface and use burst mode to increase your odds of a sharp frame.
4. Work the Angles
Macro photography is all about perspective. The same subject can look completely different depending on your angle. Get down to eye level with insects. Shoot flowers from directly above, from the side, or from behind. Use your composition rules knowledge — leading lines, negative space, and the rule of thirds all apply at macro scale, often with dramatic results.
Lighting for Macro Photography
Lighting is the single most challenging aspect of macro photography. At close distances, your lens and camera body often block the very light you need. Understanding how to work with natural light, flash, and continuous lighting will transform your results.
Natural Light
Soft, diffused natural light — such as on an overcast day or in open shade — is ideal for macro work. It reveals detail without creating harsh shadows or blown highlights. Early morning and late afternoon provide the most flattering light, and these times are also when many insects and small creatures are most active. Use a diffuser or a white umbrella to soften direct sunlight further.
Flash and Diffusers
Many professional macro photographers rely on flash to freeze motion and control light precisely. The key is diffusion — a bare flash creates specular highlights and harsh shadows that ruin close-up images. A dedicated macro flash (twin-light or ring flash) or a standard speedlight fitted with a large diffuser will produce soft, even illumination. Position the flash close to your subject and adjust power manually for consistent results.
Continuous LED Lighting
LED panels and ring lights offer a "what you see is what you get" advantage — you can preview exactly how the light falls on your subject before you press the shutter. They're particularly useful for focus stacking, where consistent illumination across multiple frames is critical. However, they may not provide enough power for outdoor work or fast-moving subjects.
Whichever lighting approach you choose, pay attention to white balance. Flash and LED sources often have different color temperatures than daylight, and mixed lighting can create color casts that are difficult to correct in post. If you're serious about color accuracy, our color theory photography guide can help you understand how to manage color in your macro work.
Focus Stacking & Depth of Field
Focus stacking is the technique of combining multiple images — each focused on a different part of the subject — into a single image with dramatically greater depth of field. It's the secret weapon of professional macro photographers and an essential skill for anyone serious about the genre.
How Focus Stacking Works
- Set up your camera on a sturdy tripod with a focusing rail if possible.
- Choose your aperture. Most stacking is done between f/4 and f/8, where your lens is sharpest. Avoid f/16 and beyond, where diffraction softens the image.
- Set manual focus and manual exposure. Lock in your shutter speed, aperture, and ISO so they don't change between frames.
- Take a series of shots, adjusting focus slightly between each frame. Start with the nearest part of your subject in focus and work toward the farthest. Typically, 5–30 frames are needed depending on the subject depth.
- Combine the images in software like Helicon Focus, Zerene Stacker, or Adobe Photoshop's auto-blend feature.
Focus Bracketing in Camera
Many modern cameras offer built-in focus bracketing, which automatically captures a series of shots at different focus distances with a single shutter press. This feature is a game-changer for macro photographers, eliminating the tedium of manually adjusting focus for each frame. If you're in the market for a camera with this capability, check our new camera releases and trending camera gear sections for the latest models.
Alternative: Focus Stacking Without a Tripod
For living subjects that won't stay still, handheld focus stacking is possible but challenging. Use a fast burst rate, brace yourself well, and take more frames than you think you need. Software can often align slightly misaligned frames, but the more consistent your framing, the better the result.
Composition Tips for Tiny Subjects
Great macro photography is about more than technical perfection — it's about creating a compelling image. Here's how to compose close-up shots that grab and hold attention.
Simplify the Background
At macro distances, backgrounds blur into smooth washes of color. Use this to your advantage: position yourself so that distant elements become soft, non-distracting backdrops. A shallow depth of field is your friend — use it deliberately to isolate your subject and eliminate clutter.
Focus on the Eyes (or Equivalent)
With living subjects — insects, spiders, small animals — the eye (or eyes) should almost always be the sharpest point in the image. This is where viewers' attention naturally goes. If your subject has multiple eyes, focus on the nearest prominent one. For flowers, the stamen or the point of most intricate detail often serves the same purpose.
Use Color and Contrast
Macro photography excels at revealing color relationships that are invisible at normal viewing distances. Complementary colors (blue and orange, green and red) create visual tension; analogous colors (shades of green, for example) create harmony. Understanding color theory will help you make deliberate choices about what to include and exclude from your frame.
Experiment with Abstract Macro
Not every macro image needs to show a recognizable subject. Abstract macro — extreme close-ups of textures, patterns, and surfaces — can be stunningly beautiful. Rust, peeling paint, fabric weaves, water droplets, and frost patterns all make excellent abstract subjects. This approach frees you from the constraints of literal representation and lets you focus purely on form, color, and light.
Consider Black and White
Macro subjects often have incredible texture and tonal variation that can be lost in color. Converting to black and white (or shooting with monochrome in mind) emphasizes shape, form, and texture. Our black and white guide explores how to see in monochrome and make the most of tonal contrast.
Recommended Camera Settings for Macro Photography
While exact settings depend on your subject, lighting, and creative intent, here's a reliable starting point for most macro situations:
| Setting | Recommendation | Why |
|---|---|---|
| Shooting Mode | Aperture Priority (Av/A) or Manual (M) | You need control over depth of field |
| Aperture | f/8 to f/16 | Balance between depth of field and diffraction |
| ISO | 100–400 (as low as possible) | Minimize noise in detailed images |
| Shutter Speed | 1/125s or faster (handheld); any (tripod) | Prevent motion blur |
| Focus Mode | Manual Focus (MF) | Autofocus is unreliable at high magnification |
| Drive Mode | Single or 2-second timer | Eliminate vibration from shutter press |
| Image Stabilization | Off (on tripod); On (handheld) | Prevents IS-induced blur when stabilized |
If you're transitioning from another genre, you may need to unlearn some habits. In portrait photography, for example, you often use wider apertures and rely on autofocus. In landscape photography, you typically use very small apertures for deep depth of field — which doesn't work in macro due to diffraction. Each genre has its own technical demands, and macro is among the most demanding.
Frequently Asked Questions About Macro Photography
Do I need a dedicated macro lens to start?
No. Extension tubes, close-up filters, and reverse-mounting rings are affordable alternatives that work with lenses you already own. That said, a dedicated macro lens delivers the best optical quality and convenience, especially if you plan to shoot macro regularly.
What's the best focal length for macro photography?
It depends on your subject. 60mm–90mm lenses are great for products, flowers, and flat-lay work. 100mm–105mm is the most versatile all-rounder. 150mm–180mm is ideal for insects and other skittish subjects where you need more working distance.
Why are my macro photos blurry?
The most common causes are insufficient depth of field (too little of your subject is in focus), camera shake (even tiny movements are magnified at macro distances), and diffraction (using an aperture that's too small, like f/22). Use a tripod, a remote release, and consider focus stacking for maximum sharpness.
Can I shoot macro photography handheld?
Yes, but it's challenging. Use a fast shutter speed (1/250s or faster), enable image stabilization, brace yourself against a solid object, and take multiple shots in burst mode. For the sharpest results, especially when focus stacking, a tripod is strongly recommended.
What is focus stacking and do I need it?
Focus stacking is combining multiple images focused at different distances into one image with greater depth of field. It's essential for subjects with significant depth (like insects or flowers) when you want the entire subject sharp. Many modern cameras offer built-in focus bracketing to automate the capture process.
Final Verdict: Your Macro Photography Journey Starts Here
Macro photography is one of the most rewarding genres in photography. It forces you to slow down, observe carefully, and master your craft in ways that few other disciplines demand. The skills you develop — precise focus, lighting control, composition under constraint — will elevate every other type of photography you pursue.
Start with the gear you have. A basic camera, an extension tube or close-up filter, and a diffused flash or even a simple LED panel are enough to begin. As your skills grow, invest in a dedicated macro lens, a sturdy tripod, and a focusing rail. The results will speak for themselves.
If you're looking to expand your knowledge further, explore our Photography Style & Technique Hub for guides on other genres and techniques, or browse our camera shop resources to find the best deals on macro equipment. You can also check our community favorite cameras to see what other macro enthusiasts are using.