
Lighting Techniques: Master the Art of Photography Lighting
Discover how to shape light, create mood, and elevate your photography. From natural golden hour to advanced studio setups, this guide covers everything you need to know about lighting techniques.
START LEARNINGWhy Lighting Techniques Matter in Photography
Lighting is the soul of photography. It shapes mood, defines texture, and guides the viewer's eye. Whether you are shooting a portrait, a landscape, or a macro shot, understanding how to control light separates a snapshot from a masterpiece. The exposure triangle—aperture, shutter speed, and ISO—works hand-in-hand with lighting to determine your final image.
In this comprehensive guide, we will explore both natural and artificial lighting techniques. You will learn how to read light, modify it, and use it creatively to achieve professional results. By the end, you will have the knowledge to confidently tackle any lighting scenario, whether you are using a DSLR for beginners or a compact mirrorless camera.
Quick Tip: Great lighting is not about expensive gear. It is about understanding the quality, direction, and color of light. A simple LED flash or a reflector can dramatically improve your photos.
Natural Lighting Techniques
Natural light is free, abundant, and incredibly versatile. The key is to know when and how to use it. The angle and quality of sunlight change throughout the day, offering different creative opportunities.
Golden Hour and Blue Hour
The golden hour, shortly after sunrise and before sunset, provides warm, soft, and directional light. It is ideal for portraits and landscapes. The blue hour, just before sunrise and after sunset, offers cool, moody tones perfect for cityscapes and long exposure shots.
Window Light
Window light is a classic technique for portrait photography. Position your subject perpendicular to a large window for soft, directional light that flatters the face. Use a reflector or white foam board to fill in shadows on the opposite side.
Open Shade
Open shade, such as under a tree or an overhang, provides even, diffused light. It is perfect for avoiding harsh shadows on sunny days. This technique is especially useful for street photography and macro photography.
Backlighting and Silhouettes
Backlighting occurs when the light source is behind your subject. It can create a beautiful rim light or a dramatic silhouette. For a well-exposed subject with a glowing rim, use fill flash or a reflector. For a silhouette, expose for the background. This technique works wonders for landscape photography and wildlife photography.
Studio Lighting Techniques
Studio lighting gives you complete control over intensity, direction, and color. Whether you use strobes or continuous lights, mastering these setups will elevate your work.
Key Light, Fill Light, and Backlight
The three-point lighting setup is the foundation of studio photography. The key light is your main light source, the fill light softens shadows, and the backlight separates your subject from the background. This setup is essential for portrait photography and commercial work.
Rembrandt Lighting
Named after the painter, Rembrandt lighting creates a small triangle of light on the cheek opposite the light source. It is dramatic and moody, perfect for character portraits. Position your key light at a 45-degree angle and slightly above your subject.
Butterfly Lighting
Butterfly lighting places the light directly in front of and above your subject, creating a butterfly-shaped shadow under the nose. It is flattering for most faces and is a staple in beauty and fashion photography.
Split Lighting
Split lighting divides the face into two equal halves—one lit, one in shadow. It is a bold, dramatic technique often used in editorial and fine art portraits.
Loop Lighting
Loop lighting is a slight variation of butterfly lighting, where the light is positioned at a 30-45 degree angle. It creates a small loop shadow beside the nose and is one of the most versatile and flattering setups.
Creative Lighting Techniques
Once you master the basics, you can experiment with creative lighting to develop your unique style. These techniques can be applied to various genres, from street photography to macro photography.
Gels and Color Theory
Using colored gels on your lights can create dramatic effects. Understanding color theory helps you choose complementary or contrasting colors. For example, a blue gel on the background and an orange gel on the subject creates a cinematic look.
Light Painting
Light painting involves moving a light source during a long exposure. It is a fun and experimental technique that can produce stunning, abstract results. You can use a flashlight, a sparkler, or even your phone screen.
High-Speed Sync (HSS) Flash
High-speed sync allows you to use flash at shutter speeds faster than your camera's sync speed. This is useful for freezing motion or using a wide aperture in bright daylight. It is a powerful tool for portrait photography outdoors.
Reflectors and Diffusers
Reflectors bounce light into shadows, while diffusers soften harsh light. They are inexpensive and portable, making them essential for both natural and studio lighting. A 5-in-1 reflector is a great starter accessory.
Choosing the Right Lighting Equipment
The equipment you choose depends on your genre and budget. Here are some recommendations to get you started.
For Beginners
Start with a single LED flash or a continuous LED panel. These are affordable and easy to use. A basic reflector and a diffuser will cover most situations. If you are interested in portrait photography, a 50mm lens and a window are all you need to practice.
For Enthusiasts
Invest in a two-light kit with softboxes. This allows you to practice three-point lighting and experiment with different modifiers. Look for strobes with adjustable power settings and a built-in receiver for wireless triggering.
For Professionals
Professional studios use high-end strobes, large modifiers, and precise light meters. Brands like Profoto, Godox, and Elinchrom are popular choices. For video work, continuous LED panels with high CRI are essential.
When choosing gear, consider your camera system. For example, if you use a compact mirrorless camera, you might prefer lightweight LED panels. If you shoot with a DSLR, you can handle heavier strobes. Always check compatibility with your camera lens and other accessories.
Recommended Lighting Equipment
⚠️ AFFILIATE DISCLOSURE: This website contains affiliate links. As an affiliate Associate, we earn from qualifying purchases. If you make a purchase through these links, we may receive a small commission at no additional cost to you. Read our full affiliate policy.

Picture Perfect Lighting: An Innovative Lighting System for Photographing People
Check price on Amazon
Product Photography: Lighting, Composition, and Shooting Techniques
Check price on Amazon
Light ― Science & Magic: An Introduction to Photographic Lighting
Check price on Amazon
Studio Portrait Lighting: 100 Lighting Cards
Check price on Amazon
Scenic Design and Lighting Techniques
Check price on Amazon
Godox Softbox and Lighting Kit Manual: Step-by-Step Setup, Positioning, and Pro Lighting Techniques for Studio and Home Shoots
Check price on Amazon
Christopher Grey's Studio Lighting Techniques for Photography
Check price on Amazon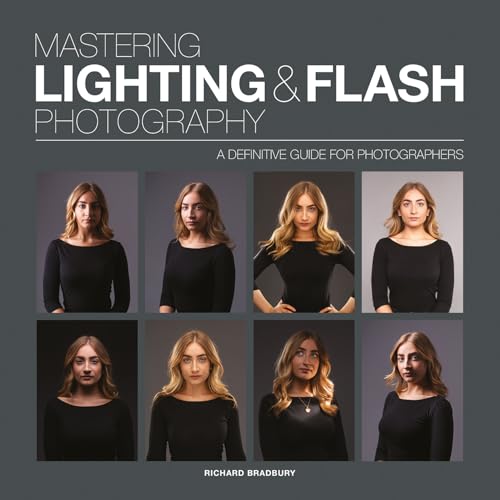
Mastering Lighting & Flash Photography: A Definitive Guide for Photographers
Check price on AmazonFinal Thoughts on Lighting Techniques
Mastering lighting techniques is a journey. Start with natural light, practice the classic studio setups, and then experiment with creative approaches. Remember, the best lighting is the one that serves your story. Whether you are capturing a portrait, a landscape, or a street scene, understanding light will make your images more compelling.
As you progress, you may want to explore advanced topics like HDR photography or film emulation. You can also check out our guides on highest rated cameras and trending camera gear to find the right tools for your lighting journey. For those looking to build a portfolio, our portfolio building guide offers valuable insights.
If you are just starting out, visit our camera starter hub for a complete roadmap. And if you are looking for the best deals, explore our photography shop or camera store recommendations. With the right knowledge and gear, you can confidently tackle any lighting challenge.