Indoor Photography Lighting for Beginners
Master the art of indoor lighting. Learn natural light, artificial setups, budget gear, and simple techniques to transform your home photos from flat to professional.
START LEARNINGWhy Indoor Lighting Matters: Indoor photography is where most beginners struggle. Unlike outdoor shoots where the sun provides endless light, indoor spaces require you to understand, control, and shape light. The good news? You don't need expensive gear to get started. This guide will walk you through everything you need to know about indoor photography lighting for beginners, from using natural window light to building a budget home studio.
Whether you're shooting portraits, product photos, or just want to capture better memories at home, mastering light is the single most impactful skill you can develop. Let's dive in.
Understanding the Basics of Indoor Light
Before you buy any gear, you need to understand the three fundamental properties of light: intensity, direction, and color temperature. Intensity is how bright or dim the light is. Direction refers to where the light is coming from (front, side, back, top, or bottom). Color temperature is measured in Kelvin (K) and determines whether light appears warm (yellow/orange) or cool (blue).
Most indoor lighting falls between 2700K (warm, typical household bulbs) and 6500K (cool, daylight). Mixing different color temperatures in one shot creates color casts that are difficult to fix in editing. For consistent results, stick to one color temperature or use a custom white balance. If you're just starting out with a basic camera, understanding these principles will help you get better results even with a beginner point and shoot digital camera.
Natural Light: Your Free Lighting Tool
Natural light from windows is the most accessible and flattering light source for beginners. The key is learning how to position your subject relative to the window.
Side Lighting
Position your subject perpendicular to the window. This creates soft shadows on one side of the face, adding depth and dimension. It's the most flattering setup for portraits and works beautifully for still life.
Front Lighting
Place your subject facing the window directly. This creates even, flat lighting with minimal shadows. Great for product photography and when you want a clean, bright look, but less dramatic than side lighting.
Backlighting
Put the window behind your subject. This creates a glowing rim light around their edges but can make the face too dark. Use a reflector or a white foam board to bounce light back onto the subject.
Window Diffusion
Harsh direct sunlight creates hard shadows. Hang a sheer white curtain or a diffusion panel over the window to soften the light. This mimics the effect of a professional softbox at zero cost.
Pro Tip: The Golden Hours for Indoor Natural Light
- Morning (7–10 AM): Soft, cool light with gentle shadows. Ideal for portraits and product shots.
- Midday (11 AM–3 PM): Harsh, direct light. Use diffusion or move away from the window to avoid harsh shadows.
- Late Afternoon (4–6 PM): Warm, golden light. Perfect for cozy, atmospheric indoor photos.
- Overcast Days: Nature's softbox. Even, diffused light all day long—great for beginners.
Artificial Lighting: When You Need More Control
Natural light is fantastic, but it's not always available. Artificial lighting gives you consistent, controllable illumination regardless of the weather or time of day. Here are the main options for beginners:
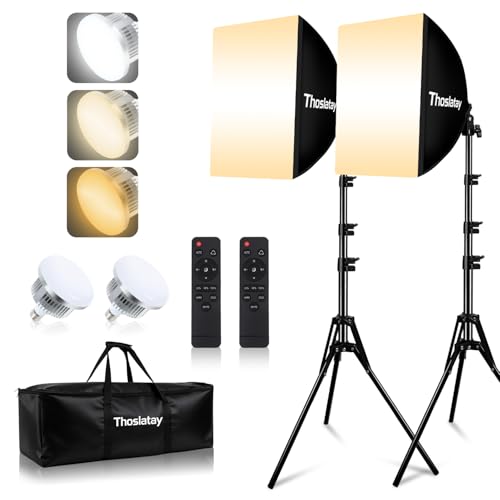
Continuous Lights (LED Panels)
These stay on constantly, making them perfect for beginners. You see exactly what the light looks like before you shoot. Modern LED panels are affordable, dimmable, and often include adjustable color temperature. A basic bi-color LED panel costs between $30–$80.
Speedlights (Flashes)
Battery-powered flashes that attach to your camera's hot shoe. They're powerful and portable but require practice to master. You can't see the effect until you take the shot. Entry-level speedlights start around $50–$100. Best for those who want to grow into more advanced lighting.
Studio Strobes
Professional-grade flashes with modeling lights. They're more expensive ($150–$500+) and usually require stands and modifiers. Not necessary for beginners, but worth considering if you plan to do serious portrait work later.
Ring Lights
Circular lights that provide even, shadowless illumination. Popular for vlogging, makeup tutorials, and macro photography. They create a distinctive catchlight in the eyes. Basic models cost $25–$60.
For beginners, I recommend starting with a simple LED panel or a ring light. They're forgiving, easy to use, and won't break the bank. If you're also interested in capturing video content, a continuous light is the better choice because it works for both photo and video. If you're considering a camera upgrade for indoor work, a budget mirrorless camera for beginners often performs better in low light than older DSLRs, making it a smart pairing with artificial lighting.
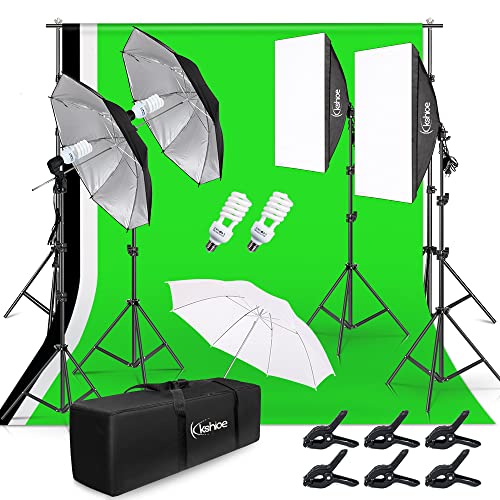
Building a Budget Indoor Lighting Kit
You don't need to spend a fortune to get professional-looking results. Here's a practical breakdown of a beginner-friendly indoor lighting kit with current market prices:
| Item | What It Does | Typical Price |
|---|---|---|
| Bi-Color LED Panel | Main light source with adjustable color temperature (3200K–5600K) | $40–$80 |
| Light Stand | Holds your light at the right height and angle | $20–$35 |
| White Foam Board (Reflector) | Bounces light back to fill in shadows | $5–$10 |
| Diffusion Panel or Sheer Curtain | Softens harsh light for flattering results | $10–$25 |
| Black Foam Board (Flag) | Blocks light to create shadows and depth | $5–$10 |
| Extension Cord & Power Strip | Powers multiple lights without outlet juggling | $10–$20 |
Total investment: Around $90–$180 for a complete beginner setup. That's less than the cost of a single professional lens. And if you already own a camera, even a cheap but good camera for photography, this kit will immediately improve your indoor shots.
Three Simple Indoor Lighting Setups to Master
Once you have your gear, practice these three classic setups. They form the foundation of almost all professional indoor photography.
1. The One-Light Setup (45° Angle)
- Place your main light at a 45-degree angle to your subject, slightly above eye level.
- Position a white foam board on the opposite side to bounce light into the shadows.
- This is the simplest and most versatile setup for portraits and products.
- It creates a natural, flattering look with enough shadow for depth.
2. The Two-Light Setup (Key + Fill)
- Use your main light (key) at 45° as before.
- Add a second light (fill) on the opposite side at lower power to soften shadows.
- Alternatively, use a reflector instead of a second light for a softer fill.
- This setup gives you more control over contrast and is great for professional-looking portraits.
3. The Window + Reflector Setup (Natural Light)
- Position your subject next to a large window for side lighting.
- Place a white foam board on the shadow side to bounce light back.
- Use a sheer curtain to diffuse harsh sunlight if needed.
- This is completely free and produces beautiful, natural results.
- Perfect for beginners who want to learn without buying any artificial lights.
Common Indoor Lighting Mistakes (And How to Fix Them)
Even with the right gear, beginners often make these mistakes. Here's how to avoid them:
Mistake #1: Mixing Color Temperatures
- Problem: Using a warm household lamp alongside cool daylight from a window creates orange and blue color casts.
- Fix: Turn off other light sources or use a custom white balance. Stick to one color temperature for all lights in a scene.
Mistake #2: Harsh Shadows from Direct Light
- Problem: Placing a bare light too close to your subject creates hard, unflattering shadows.
- Fix: Move the light further away, add diffusion (sheer curtain or diffusion panel), or bounce the light off a white wall or ceiling.
Mistake #3: Flat, Uninspired Lighting
- Problem: Using only front lighting from the camera's built-in flash creates flat, shadowless images with no depth.
- Fix: Move your light to a 45-degree angle. Add a reflector or a second light to create dimension. Avoid using the pop-up flash whenever possible.
Mistake #4: Ignoring the Background
- Problem: A bright background behind a dimly lit subject creates a silhouette or distracts from the main subject.
- Fix: Light your background separately or move your subject further away from the wall. Use a black flag to block unwanted light.
Camera Settings for Indoor Photography
Your camera settings work hand-in-hand with your lighting. Here are starting points for indoor shoots:
Recommended Starting Settings
- Aperture: f/2.8–f/5.6 for portraits (shallow depth of field), f/8–f/11 for products (sharp throughout).
- Shutter Speed: 1/60s or faster when hand-holding. Use a tripod for slower speeds.
- ISO: Start at 100–400. Increase only if needed. Modern cameras handle ISO 1600 well, but noise increases.
- White Balance: Set to match your light source (3200K for tungsten, 5600K for daylight, or use custom WB with a gray card).
- Shooting Mode: Aperture Priority (Av/A) for most indoor work. Manual mode once you're comfortable.
If you're using a point-and-shoot or a smartphone, look for scene modes like "Portrait" or "Indoor." These automatically adjust settings for you. For more control, consider upgrading to a camera with manual controls, like a semi-professional camera for beginners. Even a 35mm SLR film camera with manual controls can teach you a lot about light, though digital is more forgiving for learning.
Editing Tips to Enhance Indoor Lighting
Post-processing can rescue a decent indoor shot and make a great one stunning. Here are quick edits to apply:
- White Balance Correction: Fix any color casts by adjusting the temperature slider.
- Exposure & Shadows: Lift shadows to reveal detail in dark areas. Don't overdo it or the image looks flat.
- Highlights: Reduce highlights to recover blown-out areas from bright windows.
- Contrast: Add a little contrast to restore depth lost from flat lighting.
- Noise Reduction: Apply light noise reduction if you shot at high ISO.
- Vibrance: Boost vibrance slightly to make colors pop without oversaturating skin tones.
Ready to Transform Your Indoor Photos?
Indoor photography lighting doesn't have to be intimidating. Start with natural window light, add a simple LED panel, and practice the one-light setup. Within a few sessions, you'll see a dramatic improvement in your photos. Remember: light is the language of photography. Learn to speak it fluently, and every shot you take—indoors or out—will benefit.
Explore More Lighting Guides