
Infrared Camera for Heat Loss Detection: The Ultimate Guide
Stop losing money on energy bills. Discover how a thermal imaging camera can pinpoint hidden air leaks, missing insulation, and moisture damage in your home before they become expensive problems.
View Top Thermal CamerasWhy Thermal Imaging? An infrared camera for heat loss detection transforms the invisible world of temperature into a clear, actionable map. It’s the most effective tool for diagnosing energy inefficiency, validating insulation work, and ensuring your home is as efficient as it can be.
Why You Need a Thermal Camera for Energy Audits
As energy costs continue to rise, ensuring your home is properly sealed and insulated is more critical than ever. An infrared camera for heat loss detection is not just a gadget for professionals; it's an essential diagnostic tool for any homeowner looking to reduce their carbon footprint and monthly expenses. These devices, also known as thermal imaging cameras, visualize temperature differences by capturing infrared radiation. In the context of a home energy audit, this technology reveals exactly where your home is losing heat in the winter or gaining heat in the summer.
Without a thermal camera, you are essentially guessing where the problems are. You might feel a draft, but you can't see the extent of the leak or if it's coming from around a window frame, an electrical outlet, or a gap in the foundation. A thermal camera turns guesswork into a precise science, allowing you to target your repairs and insulation upgrades effectively. This guide will walk you through how the technology works, what features to look for, and how to use it for a comprehensive home energy audit. For those also concerned about general home safety, this tool complements other security measures, much like how one might use an infrared camera to detect water leaks to prevent structural damage.
How Does an Infrared Camera Detect Heat Loss?
Every object with a temperature above absolute zero emits infrared radiation, which is invisible to the human eye. The warmer an object is, the more radiation it emits. A thermal camera uses a special sensor called a microbolometer to detect this radiation and convert it into an electronic signal. This signal is then processed to create a thermal image, or thermogram, where different colors represent different temperatures. Typically, warmer areas are shown in lighter colors like white, yellow, and red, while cooler areas are shown in darker colors like blue, purple, and black.
When you point an infrared camera at a wall, for example, you are seeing the surface temperature of that wall. If there is a gap in the insulation behind the drywall, the surface temperature of the wall in that area will be different from the surrounding area. In winter, the area with missing insulation will appear colder (darker) because the heat from inside is escaping, making the wall surface cooler. Conversely, in summer, it will appear warmer as the outside heat penetrates. This principle applies to air leaks around doors, windows, electrical outlets, and ductwork. The camera essentially makes the invisible energy loss visible, providing a clear roadmap for weatherization and repairs.
Key Features to Look For in a Thermal Camera
Not all thermal cameras are created equal. When choosing a camera for heat loss detection, you need to consider several key specifications to ensure you get accurate and useful results.
- Resolution: This is the most critical factor. A higher resolution (e.g., 160x120 pixels or 320x240 pixels) means a more detailed image, allowing you to see smaller anomalies. Lower resolution cameras (e.g., 80x60) can give you a general idea but may miss finer details.
- Thermal Sensitivity (NETD): Measured in millikelvins (mK), this indicates the smallest temperature difference the camera can detect. A lower number is better. For building diagnostics, look for a sensitivity of 50mK or less. A sensitivity of 100mK is generally not sufficient for precise energy audits.
- Temperature Range: Ensure the camera can measure temperatures within the range of your needs. For home energy audits, a range of -10°C to 150°C (14°F to 302°F) is usually sufficient.
- Accuracy: This is usually expressed as a percentage or a temperature deviation (e.g., ±2°C or ±2%). A higher accuracy ensures your readings are reliable.
- Emissivity Settings: Different materials have different emissivity (how efficiently they emit infrared radiation). A good camera allows you to adjust this setting for accurate readings on various surfaces.
- Image Blending and Visual Camera: Many modern thermal cameras feature an integrated visual light camera. The ability to blend the thermal image with the visual image (MSX or Picture-in-Picture) makes it much easier to identify the exact location of a problem.
- Data Logging and Reporting: For professional use, the ability to save images and generate reports is essential. For homeowners, the ability to save images to a memory card for later reference is very helpful.
Step-by-Step: Using Your Camera for a Home Energy Audit
To get the most out of your thermal camera, you need to use it correctly. Follow these steps for a thorough energy audit:
- Prepare Your Home: The best time to conduct a thermal audit is when there is a significant temperature difference between inside and outside. In winter, turn up your heat to around 68-72°F (20-22°C) for a few hours before the audit. In summer, do the opposite and run your air conditioning.
- Set Up Your Camera: Turn on the camera and allow it to stabilize. Set the emissivity to a general value (e.g., 0.95) if you're scanning drywall, wood, or painted surfaces. Adjust the temperature scale to focus on the temperature range you expect to see (e.g., 50°F to 80°F).
- Start with a Baseline: Before scanning problem areas, scan a known, well-insulated part of a wall. This gives you a baseline reference for what a "normal" temperature looks like.
- Scan Methodically: Start from the top of a room and work your way down. Scan walls, ceilings, and floors. Look for patterns: irregular cold or hot spots, striping, or outlines that indicate missing insulation, air leaks, or thermal bridging (where framing members conduct heat more readily than insulation).
- Inspect Common Problem Areas: Pay special attention to:
- Around windows and doors (check for leaks around frames and seals).
- Electrical outlets and light switches (a common source of air infiltration).
- Corners where walls meet ceilings and floors.
- Behind radiators and around baseboards.
- Attic hatches and pull-down stairs.
- Ductwork, especially in unconditioned spaces.
- Document Your Findings: Save thermal images of any anomalies you find. Note the location and the temperature difference. These images are invaluable when you call a contractor or apply for energy rebates. Just as you might document issues with a battery-powered security camera without wifi for security purposes, thermal images provide definitive proof of energy loss.
Beyond Heat Loss: Other Uses for Thermal Cameras
While heat loss detection is a primary application, a good thermal camera is a versatile tool for any homeowner. It can help you with:
- Detecting Water Leaks: As mentioned, a thermal camera can spot hidden moisture from leaks in roofs, walls, or pipes, which can lead to mold and structural damage. This is similar in principle to how you might use an infrared camera to detect water leaks specifically.
- Checking Insulation: Verify that new insulation was installed correctly and completely.
- Finding Overheated Electrical Components: Identify hot spots in electrical panels, outlets, and wiring before they cause a fire.
- HVAC Diagnostics: Check for blockages in heating and cooling ducts or identify failing components.
- Pest Control: Detect rodent and insect nests by their heat signatures.
- Roof Inspections: Find areas where heat is escaping, which can indicate insulation problems or moisture intrusion.
Recommended Infrared Cameras for Heat Loss Detection
⚠️ AFFILIATE DISCLOSURE: This website contains affiliate links. As an affiliate Associate, we earn from qualifying purchases. If you make a purchase through these links, we may receive a small commission at no additional cost to you. Read our full affiliate policy.

TOPDON TC004 Mini Thermal Imaging Camera, 240 x 240 TISR Resolution | 15H Battery Life, 25Hz Handheld Infrared Camera with High/Low Temp Alerts, Auto Shutdown, 128 x 128 IR Resolution, Blue
Check price on Amazon
AccuMEMS GT14S Thermal Imaging Camera, Thermometer Mode, Ultra-Light 240g | 4°F~1022°F Range, 14H Runtime, Live Tracking with Edge-Enhanced Display, Infrared Camera for HVAC/Electrical Inspection
Check price on Amazon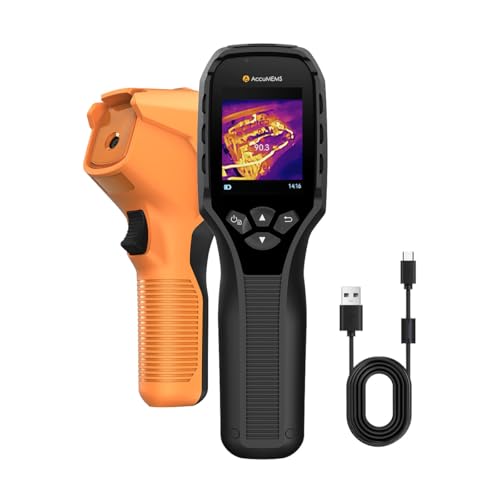
GT14S Thermal Imaging Camera with Edge Enhancement, Thermometer Mode | Infrared Camera -4°F to 1202°F Range, 240g Compact Design, 25Hz Image Frequency, 14H Runtime for HVAC/Home Inspection
Check price on Amazon
AMPBANK H128 Thermal Camera, 240 x 240 TISR Resolution, 24H Battery Life | 25 Hz Infrared Camera, Smart Temp Alarm, Drop-Proof Durable Thermal Imaging Camera for HVAC Electrical Building Inspection
Check price on Amazon
Raythink EX10 Pro 2.8" Dual-Lens Thermal Camera, 320×240 Super Resolution | 10h Continuous Runtime, Laser Pointer, Wi-Fi, 25Hz Handheld Infrared Camera for Home & Electrical Detection, -4°F~1022°F, 8G
Check price on Amazon
Mini Thermal Camera, 32×32 Thermal Imager, 1.69" Touchscreen | Portable Infrared Camera for Home Inspection, Electrical, HVAC, Circuit Boards, Heating Systems, Heat Loss and Leak Detection
Check price on Amazon
TOPDON TC004 3.5" Thermal Imaging Camera, -4°F~1022°F Temp Range | 512 x 384 TISR Resolution, 8-Hour Battery Life Handheld Infrared Camera with PC Analysis and Video Recording, 64GB Storage
Check price on Amazon
Thermal Camera, 240 x 240 TSIR Imaging Resolution, -4°F to 1022°F, 18-Hour Battery Life, 25Hz Mini Handheld Infrared Camera, 2.8" Screen, LED Lamp, 16 GB, Temp Alerts, Auto Shutdown, IP54, VectorPoint
Check price on AmazonHow to Choose the Right Thermal Camera for Your Needs
Your choice of camera should depend on your specific goals and budget.
- For Homeowners (Occasional Use): A budget-friendly camera with a resolution of 80x60 or 160x120 and a thermal sensitivity of 100mK might be sufficient for basic checks. However, for more serious DIY energy audits, a 160x120 camera with a sensitivity of 50mK is a worthwhile investment. Prices for these typically range from $250–$600.
- For DIY Enthusiasts and Serious Homeowners: Look for a camera with a resolution of 160x120 or 256x192 and a sensitivity of 50mK or less. Features like MSX (blending thermal and visual images) are extremely helpful. Prices range from $400–$1,000.
- For Professionals (Contractors, Inspectors): A high-resolution camera (320x240 or higher) with excellent thermal sensitivity (≤ 40mK), interchangeable lenses, and robust reporting software is necessary. These are professional-grade tools with prices starting around $1,000+.
Consider your budget and how frequently you'll use the device. A professional-grade tool is an investment that pays for itself through accurate diagnostics and new business opportunities, much like how a robust business security camera system protects a company's assets.
Final Thoughts: The ROI of Thermal Imaging
An infrared camera for heat loss detection is more than just a diagnostic tool; it's an investment in your home's efficiency and your financial health. By identifying and fixing energy leaks, you can significantly reduce your heating and cooling bills, improve your home's comfort, and increase its value. The cost of a good thermal camera is often recouped within a few years through energy savings alone. Whether you're a homeowner looking to lower bills or a professional expanding your service offerings, a thermal camera provides the clear, actionable data you need to make informed decisions. Just as you would invest in other home monitoring tools like home security cameras with continuous recording for protection, a thermal camera is a wise investment in your home's long-term performance and efficiency.