
Using Infrared Camera to Detect Water Leaks
Discover how thermal imaging technology can help you find hidden water leaks quickly and accurately, saving you from costly repairs and water damage.
START READINGWhy Infrared Cameras Are Essential for Water Leak Detection
Water leaks are one of the most destructive and expensive problems a property owner can face. According to industry estimates, undetected leaks can waste thousands of gallons of water annually and cause structural damage that costs thousands of dollars to repair. Traditional leak detection methods often require invasive procedures—cutting into walls, breaking floors, or dismantling fixtures. Fortunately, infrared cameras have revolutionized how professionals and homeowners approach this challenge.
An infrared camera, also known as a thermal imaging camera, detects temperature differences on surfaces. When water leaks behind a wall or under a floor, it creates a temperature anomaly—typically cooler than the surrounding dry materials due to evaporation. This temperature difference is invisible to the naked eye but clearly visible through thermal imaging. For a broader understanding of thermal detection applications, you might explore how infrared cameras detect heat loss in buildings, which shares similar principles.
💡 Key Insight: Infrared cameras can detect temperature differences as small as 0.1°C (0.18°F), making them incredibly effective at identifying moisture behind walls, ceilings, and floors without any destructive testing.
For professionals in property management or home inspection, investing in a quality thermal camera is a game-changer. It allows you to diagnose issues rapidly, provide visual evidence to clients, and recommend targeted repairs. If you're also responsible for security monitoring, you might be interested in infrared surveillance cameras for home, which use similar technology for night vision and motion detection.
How Infrared Cameras Detect Water Leaks
The science behind thermal imaging is based on the fact that all objects emit infrared radiation proportional to their temperature. An infrared camera captures this radiation and converts it into a visual image called a thermogram. Here's how it applies to water leak detection:
- Temperature Differential: Water that leaks into building materials causes evaporative cooling. The wet area appears cooler than dry areas on a thermal image.
- Thermal Patterns: Leaks often create distinct patterns—streaks, pooling, or irregular shapes—that indicate the path water is taking.
- Real-Time Visualization: Modern infrared cameras display thermal images in real-time, allowing you to scan large areas quickly.
- Non-Destructive Inspection: You can identify the exact location of a leak without cutting into walls or floors.
It's important to note that while infrared cameras are highly effective, they work best when there's a sufficient temperature difference between the wet and dry areas. This is why early morning or evening inspections often yield better results. For those dealing with outdoor moisture issues, understanding infrared wildlife cameras with motion sensors can provide additional insights into how infrared technology adapts to different environments.
Factors That Affect Detection Accuracy
- Temperature difference: Greater contrast between wet and dry areas improves visibility.
- Humidity levels: High humidity can reduce evaporative cooling, making leaks harder to detect.
- Material type: Different building materials have varying thermal conductivity and emissivity.
- Camera resolution: Higher resolution cameras provide more detailed thermal images.
Step-by-Step Guide: Using an Infrared Camera to Detect Water Leaks
Follow this comprehensive process to perform an effective thermal inspection for water leaks. Whether you're a professional inspector or a homeowner, these steps will help you achieve accurate results.
Step 1: Prepare Your Equipment
Before you begin, ensure your infrared camera is fully charged and calibrated. For best results, use a camera with a thermal sensitivity of at least 0.1°C and a resolution of 160x120 pixels or higher. If you're also monitoring outdoor areas for security, you might consider security cameras with zoom, pan, and tilt capabilities to complement your inspection toolkit.
Step 2: Create the Right Conditions
For optimal detection, you need a temperature difference between the water and the surrounding materials. The best time to inspect is:
- Early morning before the sun heats up the building
- After running hot water through pipes to create a thermal contrast
- On a cool day when indoor heating is active
Step 3: Conduct a Baseline Scan
Start by scanning areas you suspect are dry to establish a baseline temperature. This helps you identify anomalies more easily. Pay attention to areas near plumbing fixtures, water heaters, and appliances.
Step 4: Scan Suspected Areas
Slowly move the camera across walls, ceilings, and floors. Look for:
- Cool spots or streaks that deviate from the baseline
- Irregular thermal patterns that suggest moisture migration
- Areas around pipes, joints, and fixtures
For large properties or commercial buildings, you may need a more systematic approach. Professionals often use remote control inspection vehicles with cameras to access hard-to-reach areas like crawl spaces and ductwork.
Step 5: Confirm and Document Findings
Once you've identified potential leak areas, use a moisture meter to confirm the presence of water. Capture thermal images and note the temperature differences. Documentation is crucial for insurance claims and repair planning.
Step 6: Take Action
After identifying the leak, consult a professional plumber or restoration specialist. Early intervention prevents further damage and reduces repair costs. If you're dealing with sewer line issues, specialized services like running a camera through a sewer line can provide additional diagnostic information.
Best Infrared Cameras for Water Leak Detection
⚠️ AFFILIATE DISCLOSURE: This website contains affiliate links. As an affiliate Associate, we earn from qualifying purchases. If you make a purchase through these links, we may receive a small commission at no additional cost to you. Read our full affiliate policy.

TOPDON TC004 Mini Thermal Imaging Camera, 240 x 240 TISR Resolution | 15H Battery Life, 25Hz Handheld Infrared Camera with High/Low Temp Alerts, Auto Shutdown, 128 x 128 IR Resolution, Blue
Check price on Amazon
AMPBANK H128 Thermal Camera, 240 x 240 TISR Resolution, 24H Battery Life | 25 Hz Infrared Camera, Smart Temp Alarm, Drop-Proof Durable Thermal Imaging Camera for HVAC Electrical Building Inspection
Check price on Amazon
Raythink EX10 Pro 2.8" Dual-Lens Thermal Camera, 320×240 Super Resolution | 10h Continuous Runtime, Laser Pointer, Wi-Fi, 25Hz Handheld Infrared Camera for Home & Electrical Detection, -4°F~1022°F, 8G
Check price on Amazon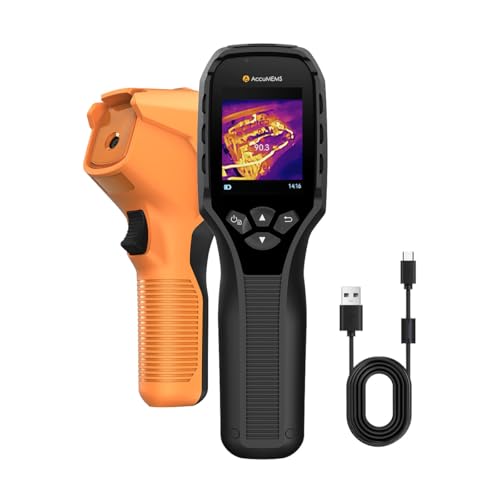
GT14S Thermal Imaging Camera with Edge Enhancement, Thermometer Mode | Infrared Camera -4°F to 1202°F Range, 240g Compact Design, 25Hz Image Frequency, 14H Runtime for HVAC/Home Inspection
Check price on Amazon
Mini Thermal Camera with Touchscreen Infrared Imager for Home Inspection | No App Required Small Thermal Imager , 80×60 IR Resolution Infrared Camera for Detect Hidden Camera, Water Leak Detection
Check price on Amazon
Thermal Master P1 Thermal Camera for Any USB-C iPhone & Android, 160x120 Ir | 320x240 Super Resolution, 3.6℉ Accuracy, Spot Tracker, -4℉-1112℉, High/Low Temp Alert for Insulation Water Leak Inspection
Check price on Amazon
FOXWELL RT280 Thermal Imaging Camera, 320 x 240 2.8" LCD, 240 x 180 TISR | -4°F~1022°F, 25Hz Infrared Camera for HVAC Electrical Building Inspection, Laser, Temp Alarm, PC Analysis, Photo & Video, 8GB
Check price on AmazonComparison of Infrared Camera Types for Leak Detection
Different infrared cameras offer varying levels of performance and features. Here's a comparison to help you choose the right one for your needs:
| Camera Type | Thermal Sensitivity | Resolution | Best For | Price Range |
|---|---|---|---|---|
| Entry-Level Thermal Camera | 0.15°C | 80x60 | Homeowners, basic inspections | $200–$400 |
| Mid-Range Thermal Camera | 0.08°C | 160x120 | Professional inspectors, contractors | $400–$800 |
| High-End Thermal Camera | 0.05°C | 320x240 or higher | Industrial applications, advanced diagnostics | $800–$2,500 |
| Smartphone Thermal Attachment | 0.10°C | 160x120 | DIYers, occasional use | $200–$500 |
When selecting a camera, consider your specific use case. For occasional home inspections, an entry-level or smartphone attachment may suffice. For professional use, investing in a higher-resolution camera with better thermal sensitivity will pay off in accuracy and efficiency. If you're also interested in monitoring your property for security purposes, explore options like security cameras that alert your phone to stay informed about any unusual activity.
Best Practices for Accurate Water Leak Detection
To get the most out of your infrared camera, follow these professional tips:
- Maintain consistent conditions: Avoid inspecting during rapid temperature changes or direct sunlight.
- Use reflective surfaces carefully: Shiny materials can reflect infrared radiation and create false readings.
- Combine with moisture meters: Thermal imaging identifies anomalies; moisture meters confirm the presence of water.
- Inspect systematically: Divide large areas into sections and scan methodically to avoid missing spots.
- Document everything: Take before-and-after images and note temperature readings for future reference.
- Calibrate regularly: Ensure your camera is calibrated according to the manufacturer's instructions.
For property managers and security professionals, integrating thermal imaging with broader security systems can provide comprehensive protection. For example, security cameras that continuously record can capture both thermal anomalies and visible activity, offering a complete monitoring solution.
Common Mistakes to Avoid When Using Infrared Cameras
Even experienced professionals can make mistakes that lead to inaccurate results. Here are the most common pitfalls:
- Inspecting at the wrong time: If the temperature difference is too small, leaks may not be visible.
- Misinterpreting reflections: Reflective surfaces like glass or polished metal can create false hot or cold spots.
- Ignoring environmental factors: Wind, sunlight, and HVAC systems can all affect thermal readings.
- Using low-resolution cameras: Insufficient resolution can make it difficult to pinpoint small leaks.
- Failing to confirm findings: Always verify thermal anomalies with a moisture meter before concluding there's a leak.
By avoiding these mistakes, you'll improve your detection accuracy and ensure reliable results. If you're also responsible for outdoor security, consider how motion detection cameras outdoor wireless can complement your inspection efforts by monitoring for intruders or unusual activity.
Frequently Asked Questions
Conclusion: Save Time and Money with Infrared Leak Detection
Using an infrared camera to detect water leaks is one of the most efficient and cost-effective methods available today. It allows you to identify problems early, avoid invasive inspections, and make informed repair decisions. Whether you're a homeowner dealing with a suspected leak or a professional inspector looking to upgrade your toolkit, thermal imaging technology offers unmatched advantages.
Remember to choose a camera that matches your needs, follow best practices, and always confirm findings with additional tools like moisture meters. By mastering infrared leak detection, you'll protect your property, save money on repairs, and gain peace of mind knowing you can catch issues before they escalate.
For those interested in expanding their use of infrared technology, exploring applications like using infrared cameras to detect water leaks is just the beginning. From home security to wildlife monitoring, the possibilities are vast.