Flood Light Security Camera Installation: A Complete Step-by-Step Guide
Everything you need to know about wiring, mounting, and configuring a floodlight camera for maximum home protection — explained in plain language for confident DIYers.
Why this guide matters: A floodlight security camera is one of the most effective deterrents against intruders, combining bright motion-activated lighting with high-definition video recording. But improper installation can lead to weak Wi-Fi signals, false triggers, water damage, or even electrical hazards. This guide walks you through each stage so you get it right the first time.
What Is a Floodlight Security Camera?
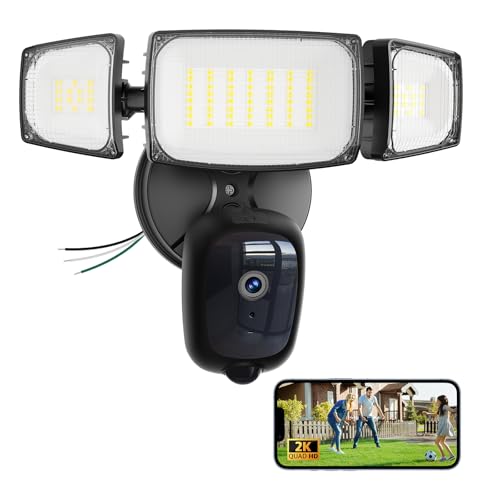
A floodlight security camera is a dual-purpose device that integrates a motion-activated LED floodlight with a built-in HD or 4K camera. Unlike standard outdoor security cameras with motion detection, these units illuminate the area the moment movement is detected, capturing clear color footage even at night. They are typically hardwired into an existing electrical junction box, making them a permanent and reliable fixture.
Most modern floodlight cams connect to your home Wi-Fi network and stream video to a mobile app. However, if your Wi-Fi doesn't reach the installation area, there are excellent security systems that don't require Wi-Fi or wired outdoor security cameras for home that can be paired with a local recorder.
Tools and Materials You'll Need
Before you begin, gather everything on this list. Missing a single item mid-installation means a frustrating trip to the hardware store.
| Category | Items |
|---|---|
| Safety Gear | Insulated gloves, safety glasses, non-contact voltage tester, voltage pen |
| Tools | Phillips and flathead screwdrivers, drill with bits, wire strippers, level, pencil, ladder, fish tape (for pulling wire) |
| Electrical | Wire nuts, electrical tape, silicone caulk, cable clips, weatherproof junction box (if needed) |
| Camera Kit | Floodlight camera, mounting bracket, screws and anchors, template (usually included) |
Step-by-Step Installation Process
The following steps assume you are replacing an existing outdoor light fixture or installing on a new junction box. If you are not comfortable working with household electricity, hire a licensed electrician — safety always comes first.
- Turn Off Power at the Breaker Locate the circuit breaker that controls your outdoor lighting and switch it off. Use a non-contact voltage tester on the existing light fixture to confirm the power is dead before touching any wires. This is non-negotiable.
- Remove the Old Fixture Unscrew the existing floodlight or porch light from the wall. Disconnect the wires — typically black (hot), white (neutral), and green or bare copper (ground). Take a photo of the wiring before disconnecting as a reference. If you're replacing a porch light with camera and motion sensor, the wiring is usually identical.
- Prepare the Mounting Surface If the existing junction box is damaged or not rated for wet locations, replace it with a weatherproof one. Apply silicone caulk around the box edges to prevent water ingress. For masonry walls, use a masonry bit and wall anchors. For siding, ensure the bracket sits flush.
- Mount the Camera Bracket Use the provided template to mark screw holes. Drill pilot holes, then secure the mounting bracket with the included screws. Use a level to make sure the bracket is straight — an off-kilter camera means crooked video.
- Make the Electrical Connections Thread the house wires through the bracket's center hole. Connect black to black (hot), white to white (neutral), and ground to ground using wire nuts. Tug gently on each connection to confirm it's tight. Wrap each wire nut with electrical tape for extra security. If your camera requires a ground wire and your box doesn't have one, consult an electrician.
- Secure the Camera to the Bracket Carefully tuck the wires into the junction box, then align the camera body with the bracket. Tighten the mounting screws firmly but do not overtighten — you can crack the housing. Apply a bead of silicone caulk around the top and sides of the camera base to seal out rain and insects.
- Restore Power and Test Turn the breaker back on. The camera should power up (many have an LED indicator). If it doesn't, turn the power off immediately and recheck your wiring. Once powered, open the manufacturer's app and follow the pairing instructions. You may need to adjust the infrared spotlight for security camera sensitivity or the floodlight trigger zone.
- Aim and Fine-Tune Use the live view in the app to aim the camera. Adjust the PIR (passive infrared) sensor angle so it covers your driveway, walkway, or yard without triggering on passing cars or swaying trees. Set the floodlight duration and brightness to suit your neighborhood.
⚠️ Electrical Safety Warning: Working with mains voltage is dangerous. If you are unsure about any step — especially grounding or wiring connections — stop and call a licensed electrician. The cost of professional installation is far less than the cost of a fire or injury.
Wired vs. Wireless Floodlight Cameras
The installation process above applies to hardwired floodlight cameras. However, not every home has an existing junction box in the right location. If running new electrical wire is impractical, you have alternatives:
- Battery-Powered Floodlight Cams: These mount almost anywhere but require periodic recharging. They're a good fit if you want a rechargeable battery powered security camera but still want floodlight functionality.
- Solar-Powered Models: A solar powered motion sensor light with camera eliminates wiring entirely and runs on free sunlight. Ideal for remote gates, sheds, or areas with strong sun exposure.
- No-WiFi / No-Subscription Options: If you object to monthly fees, look for a security camera that doesn't require subscription and records to a local SD card or NVR.
For a broader comparison of system types, see our guide to the difference between DVR and NVR security cameras.
Where to Mount Your Floodlight Camera
Placement is just as important as installation quality. A poorly placed camera leaves blind spots; a well-placed one covers entry points and deters intruders before they get close.
| Location | Recommended Height | Why It Works |
|---|---|---|
| Above garage door | 8–10 feet | Covers driveway and approach; floodlight illuminates vehicles and faces |
| Back patio / deck | 8–10 feet | Protects sliding doors and rear entry points |
| Side gate / alley | 9–12 feet | Deters trespassers; captures side-yard activity |
| Front porch | 7–9 feet | Captures faces of visitors and package deliveries |
Angle the camera slightly downward (about 15–20 degrees) to capture faces rather than the tops of heads. Avoid pointing directly at a streetlight or reflective surface, which can wash out the image and trigger false alerts.
Configuring Your Floodlight Camera
Once installed, take time to configure the software settings. Most apps offer:
- Motion Zones: Draw specific areas that trigger recording (e.g., your driveway but not the sidewalk). This dramatically reduces false alerts.
- Person Detection: AI-powered alerts that distinguish humans from animals or cars. Look for this if you want fewer nuisance notifications.
- Two-Way Audio: A outdoor security camera with 2-way audio lets you speak to visitors or warn off intruders remotely.
- Night Vision Modes: Choose between infrared (black-and-white) and full-color night vision if your camera supports it. A infrared light bulb for security camera can supplement IR range in large yards.
- Local Storage: If you prefer not to pay for cloud storage, check for a security camera that records to SD card or supports an NVR.
Common Installation Issues and Fixes
| Problem | Likely Cause | Solution |
|---|---|---|
| Camera won't power on | Loose wiring or tripped breaker | Turn off breaker, recheck wire nuts, test with voltage pen |
| Weak Wi-Fi signal | Camera too far from router | Add a Wi-Fi extender or choose a security camera that uses Ethernet cable |
| Constant false alerts | Motion sensitivity too high | Lower sensitivity, adjust PIR angle, use motion zones |
| Foggy or blurry image | Moisture inside lens or dirty dome | Check seals, clean lens with microfiber cloth |
| Floodlight stays on | Manual override or stuck sensor | Toggle in app; reset camera; check for obstructions |
Keeping Your Floodlight Camera Running Smoothly
A floodlight camera is an outdoor device exposed to rain, dust, insects, and temperature swings. A little maintenance goes a long way:
- Clean the lens and PIR sensor every 2–3 months with a soft, dry cloth.
- Check the silicone caulk seal annually and reapply if cracked.
- Trim vegetation that may sway in the wind and trigger motion alerts.
- Update firmware through the app — manufacturers frequently patch security vulnerabilities.
- Test the floodlight and recording functions after severe storms.
If you're managing multiple cameras, consider a smart professional surveillance system or a professional home surveillance system that centralizes management.
How Much Does Floodlight Camera Installation Cost?
If you do it yourself, the only cost is the camera itself — typically between $100 and $300 for a quality model with 1080p or 2K resolution and smart features. Premium 4K models with advanced AI detection can run $300–$500.
Hiring a licensed electrician to install a floodlight camera usually costs $150–$400 depending on your region, the complexity of the wiring, and whether a new junction box is needed. If you want a full multi-camera setup, professional installation for a complete system can range from $500–$2,000+. For a detailed breakdown of surveillance installation pricing, see our guide on cost to install video surveillance system.
Bottom line: A floodlight security camera is one of the best investments you can make for home safety. With the right tools, a bit of patience, and this guide, most homeowners can complete the installation in 2–3 hours. If wiring makes you nervous, hire a pro — the peace of mind is worth it. Once installed, take time to configure motion zones and alerts so your camera works for you, not against you.