
How to Install a Home Camera Surveillance System
A complete, practical guide to planning, installing, and setting up your home security camera system — whether you choose a DIY approach or hire a professional.
Start the Installation GuideInstalling a home camera surveillance system is one of the most effective ways to protect your property, monitor your family, and gain peace of mind. However, the installation process can feel overwhelming if you've never done it before. This guide walks you through every stage — from choosing the right system to mounting cameras, running cables, configuring your DVR or NVR, and testing your setup.
Whether you're considering a wireless security camera system with remote viewing and no monthly fee or a traditional wired setup, the principles remain largely the same. By the end of this article, you'll have a clear roadmap to install your system correctly and avoid the most common mistakes.
Recommended Home Surveillance Camera Systems
⚠️ AFFILIATE DISCLOSURE: This website contains affiliate links. As an affiliate Associate, we earn from qualifying purchases. If you make a purchase through these links, we may receive a small commission at no additional cost to you. Read our full affiliate policy.

GMK 4 Pack Cameras System, Security Cameras Wireless Outdoor, 2K Video | VicoHome Cam, Motion Detect, Color Night Vision, 2-Way Talk, IP65 Waterproof, Indoor&Outdoor, 2.4GHz WiFi, SD/Cloud Storage
Check price on Amazon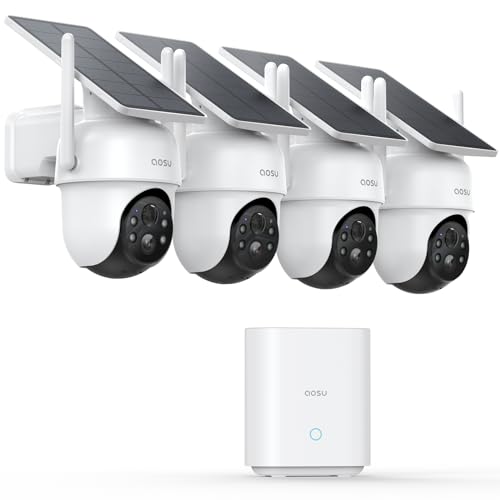
aosu D1 Classic 4-Cam Kit, Security Cameras Wireless Outdoor, Solar Powered | No Subscription Required, 32GB Built-in Storage, 360° Auto Tracking, 2K (3MP) Full-Color Night Vision, Easy Install
Check price on Amazon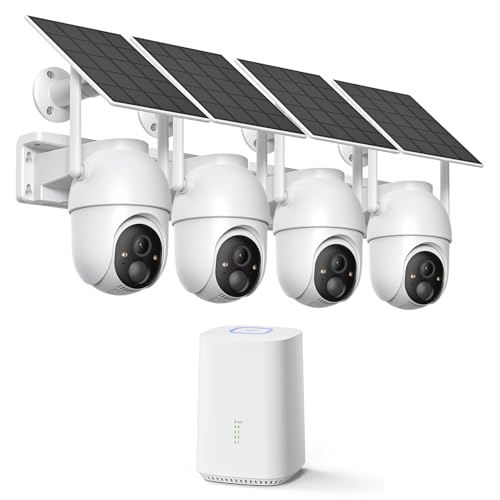
ELYSOO 2K/4MP Home Security Camera System, 2.4G & 5GHz Wi-Fi Connected | Local Storage Included, Solar Security Cameras Wireless Outdoor, IP65, Instant APP Alerts, Color Night Vision
Check price on Amazon
4CH Wired Security Camera System, AIWIXEN 4X 1080P Cam, DVR with 512GB HDD | Surveillance Cameras with Human Vehicle Detection, IP68 Waterproof, 24-7 Recording, Remote Access, Home Security CCTV Outdoor
Check price on Amazon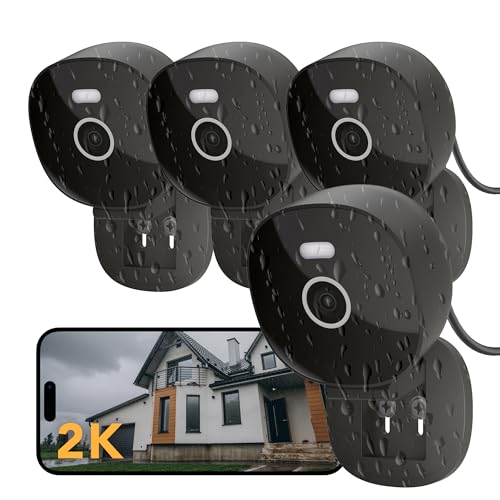
FAMVIVA 2K Wired Security Camera, Indoor/Outdoor for Home, Pet, Baby, Nanny, IP65 Waterproof Color Night Vision, White Light & Siren, Recording, Motion Detection, Works with Alexa,Pulg in, Black-4P
Check price on Amazon
ZOSI 3K Lite 8CH Home Security Camera System Outdoor Indoor,AI Human/Vehicle Detection,Night Vision,H.265+ 5MP Lite 8 Channel CCTV DVR,8pcs 1080P 1920TVL Surveillance Bullet Cameras (No Hard Drive)
Check price on Amazon
4MP Security Cameras Wireless Outdoor, No Subscription 128GB Local Storage, Solar Powered Cameras For Home Security, PTZ Auto Tracking, 4Cam-Kit, Color Night Vision Home Security Camera System,5G&2.4G
Check price on Amazon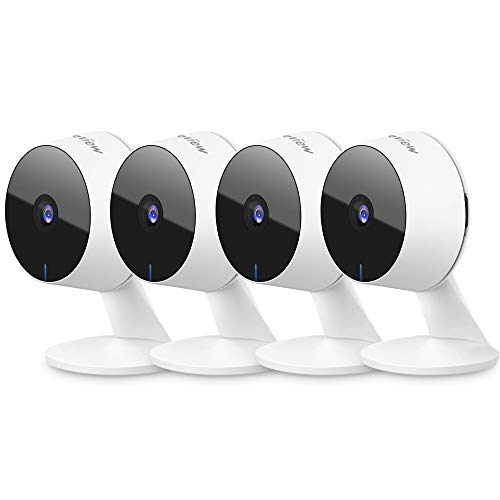
LaView Security Cameras 4pcs, Home Security Camera Indoor 1080P, Wi-Fi Cameras Wired for Pet, Motion Detection, Two-Way Audio, Night Vision, Phone App, Works with Alexa, iOS & Android & Web Access
Check price on Amazon1. Plan Your Surveillance Coverage Before You Buy
The most common installation mistake is buying cameras first and figuring out placement later. Instead, start by walking around your home and identifying the areas that need coverage. Key zones typically include:
- Front door and porch — the primary entry point for visitors and potential intruders
- Back door and patio — often the least visible entry point
- Driveway and garage — to monitor vehicles and approach paths
- Side yards and blind spots — areas where intruders may try to hide
- Interior common areas — hallways, living rooms, or areas with valuables
Once you've identified your coverage zones, decide whether you need outdoor-use security cameras for home or a mix of indoor and outdoor units. For most homes, a combination of wireless indoor and outdoor security cameras provides the best flexibility. If you have a larger property, consider a wireless outdoor security camera system that supports multiple cameras on a single network.
💡 Pro Tip: Sketch a simple floor plan of your home and mark camera positions with a pencil. This helps you visualize coverage and avoid gaps before you drill any holes.
2. Choose the Right Type of Surveillance System
There are two main categories of home surveillance systems: wired and wireless. Each has distinct advantages depending on your home layout, budget, and technical comfort level.
Wired Security Camera Systems
Wired systems use physical cables to transmit power and video signals. They are generally more reliable, offer better video quality, and don't suffer from Wi-Fi interference. A wired security camera system with monitor is an excellent choice for homeowners who want a dedicated viewing station. If you need remote access, look for a wired security camera system with remote viewing capability.
The main drawback of wired systems is the installation complexity — you'll need to run cables through walls, attics, or crawl spaces. However, once installed, they require minimal maintenance.
Wireless Security Camera Systems
Wireless systems transmit video over Wi-Fi or cellular networks, making installation far simpler. You can mount cameras almost anywhere without running cables. A wireless security camera system with monitor gives you the convenience of a dedicated display without the wiring hassle.
For areas without reliable Wi-Fi, consider a battery-powered cellular security camera that uses a mobile network to transmit footage. If you want to avoid monthly fees entirely, look for a security camera system without subscription or a home camera system without subscription.
| Feature | Wired System | Wireless System |
|---|---|---|
| Installation Difficulty | High (requires cabling) | Low (plug and mount) |
| Reliability | Excellent (no interference) | Good (depends on Wi-Fi) |
| Video Quality | Up to 4K or higher | Up to 4K (bandwidth-dependent) |
| Cost | $300–$1,500+ | $200–$1,000+ |
| Best For | Permanent, large installations | Renters, DIY, flexible setups |
3. Gather Your Tools and Prepare for Installation
Before you begin, gather all the tools and materials you'll need. Having everything on hand prevents frustrating trips to the hardware store mid-installation.
Essential Tools
- Power drill with various bits (masonry bits for brick or concrete)
- Screwdriver set (Phillips and flathead)
- Fish tape or wire fishing tools (for wired systems)
- Cable staples or clips
- Level (to ensure cameras are straight)
- Ladder or step stool
- Safety glasses and gloves
- Weatherproof silicone sealant
- Cable ties and mounting brackets
Pre-Installation Checklist
- Confirm your Wi-Fi network is strong enough in all camera locations (for wireless systems)
- Test your DVR or NVR to ensure it powers on and records properly
- Download the camera manufacturer's mobile app and create an account
- Check that you have enough storage (hard drive or SD card) for your recording needs
- Verify your internet upload speed if you plan to use remote viewing
💡 Pro Tip: If you're installing a wired system, consider hiring a professional electrician for the cable runs if you're uncomfortable working in attics or crawl spaces. The cost of home security system installation is often worth the peace of mind.
4. Step-by-Step Installation Process
Now that you've planned your coverage and gathered your tools, it's time to install your system. Follow these steps carefully to ensure a secure and functional setup.
Start by mounting your cameras in the positions you identified during planning. Use a level to ensure they're straight. For outdoor cameras, apply weatherproof silicone around the mounting base to prevent water ingress. If you're using a wireless outdoor security camera with Wi-Fi, make sure it's within range of your router.
For wired systems, run cables from each camera to your DVR or NVR. Use fish tape to pull cables through walls. Avoid running cables near power lines to prevent interference. Secure cables with staples or clips every 12–18 inches. If you're using a DVR recorder for TV without subscription, connect the DVR to your TV via HDMI for local viewing.
Plug in your cameras and recording device. For wireless battery-powered security camera systems, ensure batteries are fully charged before mounting. If you're using a solar-powered security camera with Wi-Fi, verify the solar panel receives adequate sunlight throughout the day.
Connect your DVR/NVR or wireless cameras to your home network. For wireless systems, use the manufacturer's app to connect each camera to your Wi-Fi. If you want to avoid internet dependency, consider a security camera with monitor no Wi-Fi needed or a home security camera that doesn't need Wi-Fi.
Configure your recording schedule — continuous, motion-triggered, or scheduled. A 24/7 continuous recording security camera ensures you never miss a moment, while motion alerts save storage space. Set up mobile notifications so you're alerted to activity in real time. For systems without cloud fees, a wireless security camera with SD card or home security camera with local storage is ideal.
Walk around your property and trigger motion in each camera's field of view. Check the live feed in your app or monitor. Verify that night vision works by testing after dark — a wireless security camera with night vision should automatically switch to IR mode. Test two-way audio if your camera supports it, such as a wireless security camera with two-way audio.
5. Expert Installation Tips for Better Results
These tips will help you achieve a cleaner, more reliable installation:
- Angle cameras slightly downward to avoid glare from the sun and capture faces more clearly.
- Use a dedicated Wi-Fi network for your cameras if possible. This reduces bandwidth competition with other devices.
- Enable encryption on your wireless network and change default passwords on all devices.
- Consider a 4K ultra HD security camera with color night vision for the highest detail in low-light conditions.
- Add motion-activated lighting — an outdoor motion sensor light with camera or motion sensor flood lights with camera enhances both deterrence and image quality.
- Label your cables during installation to simplify future maintenance.
💡 Pro Tip: If you're not comfortable with DIY installation, professional services are available. Security camera installation services can handle everything from mounting to network configuration. For larger properties, residential security camera installation and professional security camera installation ensure a code-compliant, reliable setup.
6. Common Installation Mistakes to Avoid
Even experienced DIYers make these mistakes. Avoid them to save time and frustration:
- Mounting cameras too high — this makes it difficult to capture faces. Aim for 8–10 feet.
- Ignoring Wi-Fi signal strength — test signal strength before mounting wireless cameras permanently.
- Forgetting about power access — ensure there's an outlet or PoE connection near each camera location.
- Skipping weatherproofing — outdoor cameras need sealed connections to survive rain and humidity.
- Not testing night vision — always verify IR performance after dark before finalizing placement.
- Overlooking legal requirements — check local laws about recording audio and pointing cameras at neighbors' property.
7. Maintaining Your Surveillance System
Once installed, your system requires periodic maintenance to function reliably:
- Clean camera lenses every 2–3 months with a microfiber cloth.
- Check and replace batteries in wireless cameras as needed.
- Review and clear old footage to free up storage space.
- Update firmware on cameras and recorders to patch security vulnerabilities.
- Test your system monthly by reviewing recent footage and triggering motion alerts.
If you're using a system without recurring fees, such as a security camera system without subscription or Wi-Fi security camera without subscription, maintenance is especially important since you're managing storage locally.
Frequently Asked Questions
How long does it take to install a home camera surveillance system?
A simple 2–4 camera wireless system can be installed in 2–4 hours. A wired system with 6–8 cameras may take a full day or more, depending on cable runs and home layout.
Do I need a professional to install my security cameras?
Not necessarily. Wireless systems are designed for DIY installation. However, wired systems or large multi-camera setups may benefit from professional installation to ensure proper cabling and code compliance.
Can I install a security camera system without internet?
Yes. Many systems support local recording via DVR/NVR or SD card. A security camera that works without Wi-Fi or a security camera that doesn't require Wi-Fi can record locally and be viewed on a monitor without internet.
What's the best camera placement for home security?
Focus on entry points: front door, back door, driveway, and side yards. Place cameras 8–10 feet high, angled slightly downward. Ensure overlapping coverage to eliminate blind spots.
How much does it cost to install a home surveillance system?
DIY installation costs $200–$1,000+ depending on the number of cameras and features. Professional installation typically adds $300–$1,500 or more, depending on complexity. See our guide on the cost of home security system installation for detailed pricing.
Final Thoughts
Installing a home camera surveillance system is a worthwhile investment in your family's safety and your peace of mind. By planning carefully, choosing the right system for your needs, and following the steps outlined in this guide, you can achieve professional-quality results without professional-level costs.
Whether you choose a simple wireless system with remote viewing and no monthly fee or a comprehensive home security system with cameras and sensors, the key is to start with a solid plan and execute it methodically. Take your time, test thoroughly, and don't hesitate to seek professional help if needed.
For more guidance on choosing the right equipment, explore our guides on what makes a good security camera system and what is a good security camera for home. With the right setup, you'll enjoy years of reliable surveillance and greater confidence in your home's security.