
Thermal Imaging Camera for Home Inspection
Discover hidden problems before they become expensive repairs. Learn how to choose the right thermal camera for your home inspection needs.
VIEW TOP PICKSWhy Thermal Imaging? A thermal imaging camera detects temperature differences invisible to the naked eye. For home inspectors, this means finding moisture intrusion, missing insulation, electrical hot spots, and air leaks quickly and non-invasively.
What Is a Thermal Imaging Camera?
A thermal imaging camera, also known as an infrared camera, captures radiation in the infrared spectrum and converts it into a visual image. Unlike standard cameras that rely on visible light, thermal cameras show you heat patterns. In home inspection, this technology is invaluable. It allows you to scan walls, ceilings, floors, and electrical panels without tearing anything apart. You can spot infrared thermal camera technology in action across many industries, but for homeowners and inspectors, it's a diagnostic superpower.
When you point a thermal camera at a wall, cooler areas often indicate moisture or missing insulation, while warmer areas can reveal air leaks or insufficient insulation. Electrical components that are overheating show up as bright hot spots, alerting you to potential fire hazards. This makes a thermal camera an essential tool for anyone serious about inspection camera work, whether you're a professional inspector or a proactive homeowner.
Key Features to Look For
Not all thermal cameras are created equal. When choosing one for home inspection, focus on these critical specifications:
- Resolution: Higher resolution (e.g., 160x120 or 320x240 pixels) provides more detail and makes it easier to identify small anomalies. Budget models often have lower resolution, which can be limiting.
- Temperature Range: For home inspection, a range of -20°C to 400°C (-4°F to 752°F) is more than sufficient. Most issues fall within this range.
- Thermal Sensitivity (NETD): Measured in millikelvins (mK), lower is better. A sensitivity of 100 mK or less ensures you can detect subtle temperature differences.
- Accuracy: Look for accuracy within ±2°C or ±2% of reading. This ensures your readings are reliable for diagnostics.
- Field of View (FOV): A wider FOV lets you scan large areas quickly, while a narrower FOV gives more detail at a distance. Many cameras offer interchangeable lenses.
- Display & Image Quality: A clear, high-contrast display is crucial for on-site analysis. Some cameras offer MSX or fusion modes that overlay visual details for better context.
- Battery Life: Ensure the camera can last through a full inspection. Look for at least 4 hours of continuous use.
- Durability: A rugged, drop-tested design is important for job site conditions.
If you're also considering other diagnostic tools, a borescope camera can complement your thermal camera by allowing you to see inside walls and ducts. For electrical inspections, a infrared scanner can be a more specialized alternative, but a general-purpose thermal camera is often more versatile.
Common Home Inspection Applications
Thermal cameras excel in several areas of home inspection. Here are the most common applications you'll encounter:
1. Moisture Detection
Water leaks, whether from plumbing, roofs, or foundations, often go unnoticed until significant damage occurs. Thermal cameras can detect the temperature difference caused by evaporative cooling, revealing hidden moisture behind walls, under floors, and above ceilings. This is critical for preventing mold growth and structural damage.
2. Insulation Deficiencies
Missing or inadequate insulation leads to energy loss and higher utility bills. A thermal camera quickly identifies areas where insulation is missing, compressed, or settled, allowing you to target repairs effectively.
3. Air Leaks
Drafts around windows, doors, and electrical outlets are easy to spot with a thermal camera. By identifying these leaks, you can seal them and improve your home's energy efficiency.
4. Electrical Hot Spots
Overheating electrical components, such as circuit breakers, wiring, and outlets, are a major fire hazard. Thermal cameras reveal these hot spots before they cause problems, making them an essential safety tool.
5. HVAC Performance
Thermal cameras can assess HVAC systems by checking for blockages, leaks, or uneven heating and cooling. This helps ensure your system is running efficiently.
6. Roof Inspections
Roof leaks and damaged insulation are often visible from the interior using a thermal camera. This can save you from costly roof repairs by catching issues early.
For those interested in outdoor monitoring, a weatherproof surveillance camera can complement your thermal inspection by providing continuous visual coverage. However, for diagnostic work, a handheld thermal camera is unmatched.
Best Thermal Imaging Cameras for Home Inspection
⚠️ AFFILIATE DISCLOSURE: This website contains affiliate links. As an Amazon Associate, we earn from qualifying purchases. If you make a purchase through these links, we may receive a small commission at no additional cost to you. Read our full affiliate policy.

TOPDON TC004 Mini Thermal Imaging Camera, 240 x 240 TISR Resolution | 15H Battery Life, 25Hz Handheld Infrared Camera with High/Low Temp Alerts, Auto Shutdown, 128 x 128 IR Resolution, Blue
Check price on Amazon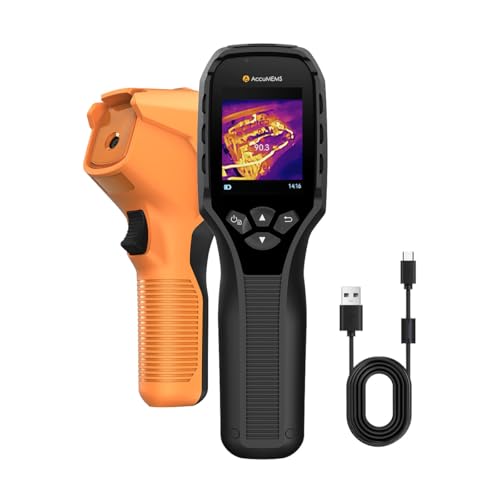
GT14S Thermal Imaging Camera with Edge Enhancement, Thermometer Mode | Infrared Camera -4°F to 1202°F Range, 240g Compact Design, 25Hz Image Frequency, 14H Runtime for HVAC/Home Inspection
Check price on Amazon
Flagfront Thermal Camera, 240 x 240 TISR Resolution for Home Inspection | 25Hz Refresh Rate , -4°F to 1022°F Temp Range with High/Low Temperature Alarm, 50°FOV Handheld Thermal Imaging Camera
Check price on Amazon
AMPBANK H128 Thermal Camera, 240 x 240 TISR Resolution, 24H Battery Life | 25 Hz Infrared Camera, Smart Temp Alarm, Drop-Proof Durable Thermal Imaging Camera for HVAC Electrical Building Inspection
Check price on Amazon
AccuMEMS GT14S Thermal Imaging Camera, Thermometer Mode, Ultra-Light 240g | 4°F~1022°F Range, 14H Runtime, Live Tracking with Edge-Enhanced Display, Infrared Camera for HVAC/Electrical Inspection
Check price on Amazon
Flir TG165-X Thermal Imaging Camera with Bullseye Laser, Spot IR | 80x60 IR, -25 to 300C, spot thermometer, MSX, IP54, building/HVAC/electrical, strap, pouch
Check price on Amazon
TOPDON TC004 3.5" Thermal Imaging Camera, -4°F~1022°F Temp Range | 512 x 384 TISR Resolution, 8-Hour Battery Life Handheld Infrared Camera with PC Analysis and Video Recording, 64GB Storage
Check price on Amazon
FOXWELL HT280 Thermal Imaging Camera, 320 X 240 2.8" LCD, 260 x 260 TISR | Thermal Camera, 25Hz Handheld Infrared Camera with Temp Alarm, PC Analysis for Home HVAC Electrical Industrial Inspection
Check price on AmazonBuying Guide: How to Choose
With so many options on the market, selecting the right thermal camera for home inspection can be overwhelming. Here's a breakdown to help you decide:
Budget ($200–$500)
Entry-level thermal cameras are perfect for homeowners who want to perform occasional DIY inspections. They typically offer lower resolution (80x60 to 120x90) and basic features. While they may not have the precision of professional models, they are still effective for spotting major issues like large air leaks or obvious moisture. The handheld thermal imaging camera category includes many affordable options that are great for beginners.
Mid-Range ($500–$1,500)
This is the sweet spot for serious DIYers and professional inspectors. You get higher resolution (160x120 to 320x240), better thermal sensitivity, and often additional features like MSX image enhancement, Wi-Fi connectivity, and interchangeable lenses. These cameras provide a good balance of performance and price.
Professional ($1,500+)
High-end thermal cameras are designed for demanding professional use. They offer the highest resolution (320x240 and above), superior sensitivity, advanced reporting software, and ruggedized builds. If you're a professional home inspector, this investment pays for itself quickly.
When evaluating models, consider the infrared thermal camera specifications carefully. Also, think about whether you need additional tools like a survey tripod for stable, hands-free scanning, or a camera harness for carrying your gear comfortably.
Tips for Effective Thermal Inspections
- Establish a Baseline: Before inspecting, let the home reach a stable temperature. The best time is when there's a significant temperature difference between inside and outside (e.g., winter or summer).
- Scan Systematically: Start from the top and work your way down. Scan walls, ceilings, and floors in a grid pattern to ensure you don't miss anything.
- Adjust Emissivity: Different materials have different emissivity. Learn to adjust your camera's settings for accurate readings, especially on shiny surfaces like metal.
- Verify Findings: A thermal anomaly doesn't always mean a problem. Use a moisture meter or other tools to confirm your findings.
- Document Everything: Take clear thermal images and notes. This is crucial for reporting and for making repair decisions.
- Practice Makes Perfect: The more you use your thermal camera, the better you'll become at interpreting images. Practice on your own home first.
For those who also need to inspect hard-to-reach areas, a snake camera can be a valuable addition to your toolkit. And if you're documenting your inspections, a high-quality webcam can help with virtual consultations.
Frequently Asked Questions
Can a thermal camera see through walls?
No, thermal cameras cannot see through walls. They detect surface temperature differences. However, they can reveal what's happening behind a wall by showing temperature patterns caused by moisture, insulation gaps, or air leaks.
Do I need a professional-grade thermal camera for home inspection?
It depends on your needs. For occasional DIY use, a budget or mid-range model is sufficient. Professional inspectors who rely on the tool daily should invest in a higher-end model for better resolution and features.
What's the difference between thermal and infrared cameras?
In common usage, the terms are often used interchangeably. Technically, all thermal cameras are infrared cameras, but not all infrared cameras are thermal. Thermal cameras detect heat, while some infrared cameras might be sensitive to other parts of the infrared spectrum.
Can I use a thermal camera for electrical inspections?
Yes, thermal cameras are excellent for electrical inspections. They can identify overheating breakers, wiring, and connections, which are fire hazards. Always follow safety protocols when inspecting electrical systems.
How much should I spend on a thermal camera for home inspection?
Expect to spend between $200 and $500 for a basic model, $500 to $1,500 for a mid-range camera, and $1,500+ for professional-grade equipment. Choose based on your frequency of use and required precision.
Final Thoughts
Investing in a thermal imaging camera for home inspection is a smart move for any homeowner or professional. It empowers you to detect issues early, save money on repairs, and improve your home's safety and efficiency. Whether you're a DIY enthusiast or a seasoned inspector, there's a thermal camera out there that fits your needs and budget. Explore our recommended products above to find the perfect match for your inspection toolkit.
Remember, the best camera is the one that helps you get the job done right. Take your time, compare features, and choose a model that you'll be comfortable using for years to come. If you're also looking to expand your toolkit for other types of inspections, consider a borescope camera or a inspection camera for tight spaces.